Machine Polishing - How To
Swirl marks are a common frustration for car enthusiasts everywhere. Fortunately, these spider-web-like blemishes often appear worse than they truly are, especially under the bright UK sun during summer. The good news is that swirls are usually minor imperfections. While they may be too stubborn for a simple hand polish, they can be effectively and safely removed using one of our Dual Action Machine Polishers. The process is quicker and easier than you might think. Plus, if you can wash a car properly, learning to enhance its finish through polishing is well within your reach.
Traditionally, achieving this level of paint correction would require an array of compounds, polishes, and pads, along with several days for a multi-stage detailing process. However, with our advanced One Step All-in-One Compound, you can achieve a swirl-free finish and be show-ready in just a few hours, instead of days. Plus, it will help maintain that flawless look all season long.
Let's dive in! Here's how you can eliminate those swirls and get your car show-ready like a pro. We'll also tackle all your most common questions along the way…

In the car detailing world, "all-in-one" products are known for offering more than traditional options. Take Tripple, our flagship All-in-One Polish, for example. It's called an all-in-one because, besides polishing—using abrasives to cut and refine paint—it also includes deep cleansing agents and leaves behind a layer of carnauba wax. So, it cleans, polishes, and protects all in one step.
One Step, which we'll use to address the heavier swirling in this detail, is also classified as an all-in-one product due to its ability to perform multiple tasks unlike a traditional compound. Although it doesn't contain cleaners or protect the paint, it offers an exceptionally wide range of cutting power. This unique feature allows it to start as a coarse cutting compound and finish as a fine refining compound. As a result, it can handle heavy swirling and defects while delivering a nearly flawless finish, all without the need to switch between different compounds or polishing pads.
The advantage of this product is that it allows you to complete all three key stages of the polishing process—coarse cutting/restoration, medium cutting, and final finishing—with a single product, all in one step. In other words, it’s been specifically engineered to save you time, money, and effort when performing paint correction on any vehicle.

All compounds work by using abrasives—sharp, heavy particles—to remove a thin layer from your paintwork or lacquer. These abrasives vary in size, ranging from coarse compounds with larger particles for heavy cutting and defect removal to fine compounds that make minimal cuts and are designed to refine the paint finish, smoothing out the surface and eliminating finer defects from earlier polishing stages. Think of it like using sandpaper on wood: you start with a coarse grade to shape the wood, then move to finer grades to smooth the surface. Polishing paint follows the same principle—you progress through different grades of compound and pad, from coarse to fine, until you achieve the desired finish.
The polishing process achieves three key actions simultaneously:
1. Cutting the Surface: The polish removes the top layer of the paintwork to level it down to the depth of the deepest defect. Whether it's a scratch, swirl mark, or micro scratch (hologram) from a previous polishing stage, you're not removing the defect directly. Instead, you're removing the surrounding surface until the blemish effectively disappears.
2. Smoothing the Surface: Polishing also smooths out the surface, improving both its physical and optical appearance. Defects like swirl marks catch light and scatter it in various directions, making the paint look dull and damaged. By cutting out the microscopic ridges and ruts, the light reflects more uniformly, giving the paint a deeper, glossier appearance. The smoother the surface, the better the finish.
3. Breaking Down Abrasives: As you polish, the abrasive particles gradually break down until they can no longer cut the surface—a process known as "working the product through." Initially, the particles are like large, jagged rocks, but as they collide and break down, they become smooth pebbles. Once all the sharp edges are rounded off, the abrasives can no longer abrade the paint, signaling the end of that polishing stage.
For detailed information on the various types of polishes and compounds and how they work, check out our comprehensive article, "All Car Polishes Explained."

All polishes and compounds (which are technically the same thing) have a specific range of cutting power. Traditional coarse compounds, for instance, start with large cutting particles that only become slightly smaller and more rounded as they break down, resulting in a limited range of cut. Even after being worked through, a coarse compound will leave a surface with minor defects—better than the original flaws but still needing additional refinement. This is why further stages with progressively finer compounds are necessary.
One Step stands out because it uses advanced diminishing abrasives. Initially, these abrasives are large particles, but unlike traditional compounds that merely round off, they are designed to break into progressively smaller, sharper particles as you work them. This means they continue cutting effectively through each stage of polishing. By the time the particles become rounded and lose their cutting ability, they are so fine that they’ve already refined the paint to a near-flawless finish. This allows One Step to transition from a heavy-cutting compound to a fine refining compound, offering a wide range of cutting power.

Technically, you could use One Step as a hand polish, but it would be extremely time-consuming to break down the particles and achieve the desired results. Additionally, you’d likely encounter inconsistent results due to varying pressure and fatigue, which can prevent you from working the product through completely.
One Step is specifically designed for use with a dual-action machine polisher, like our DPX or MPX models. Unlike hand polishing, machines don’t tire and can break down the product quickly and effectively. Although you’ll need a slightly longer time to work One Step through compared to a traditional compound, the additional time is minimal. Machines also provide more consistent results, as they operate uniformly across every panel.

It depends on the task, but the great news is that you can use any protection you prefer!
One of the main advantages of One Step is that it delivers a genuine finish, as it contains no fillers or waxes. However, this doesn’t mean that products with fillers or waxes are unsuitable for paint enhancement. For instance, we often use Tripple All-in-One Polish with a machine polisher for lighter defect removal, cleaning up oxidation, and adding a protective wax layer when needed.
One Step not only tackles heavier defects but also preserves the surface chemistry required for applying a ceramic coating, as it lacks additional ingredients. Since silica-based coatings cannot bond over wax layers, it’s essential to use a true-finish compound like One Step before applying ceramic protection. Conversely, waxes and sealants physically adhere to the surface, so they can be applied after One Step, just like any polish containing wax.

Tripple is excellent for enhancement details, effectively removing light defects and oxidation. If you plan to use a wax as your final protection layer and Tripple can address the defects you're targeting, then yes, you can use it. Check out a similar detail using Tripple for a fast enhancement in "The Half Day Enhancement."
For heavier swirl marks and when planning to apply a ceramic coating for protection, One Step is the ideal choice for a single-stage correction and enhancement.


As always, the best way to showcase this type of enhancement and correction is by performing the work ourselves. To illustrate, we brought in a car that needed a thorough refresh before its next event.
Throughout the winter, this car has been frequently used on the road and, due to regular washing and wiping, has developed some light defects, including swirls, wash marring, and minor oxidation. However, these issues can be effectively addressed with a thorough deep clean and a single-stage correction using One Step. Check out the full detail video, followed by a detailed step-by-step guide on how the process was completed...
There are show cars, and then there are show cars that are actually driven. Since this one falls into the latter category, we decided to take things a step further with some extra deep-cleaning. The first step in this process involves removing the wheels and thoroughly cleaning the wheel arches.
Cleaning thoroughly here is arguably even more crucial than during routine maintenance. It’s not just about appearances or making hard-to-reach areas, like inner wheel arches and behind wheel spokes, easier to clean. The key point is that deep-cleaning helps limit damage by removing harsh contaminants that could cause problems later during paint correction. Any sharp particles dislodged and transferred onto your polishing pad can scratch your paintwork, leading to additional damage that will require more polishing. Remember, the golden rule for paint correction is to polish only when necessary.
Deep-cleaning also plays a crucial role later during the pre-wash process, especially in areas like door shuts and panel gaps. It’s essential to remove as many contaminants as possible from the vehicle.
Here, the process is straightforward: safely remove each wheel one by one and thoroughly clean the areas that trap the most dirt. The good news is that using a strong, 1:5 dilution of Verso All Purpose Cleaner makes it easy to break down grime. Agitate the cleaner with our Arch Blaster Arch Brush, then use a pressure washer to quickly rinse away the residue.


For cleaning the wheels and tires, use your preferred wheel cleaners and decontamination products, such as Imperial Wheel Cleaner, Revolution Wheel Soap, Reactive Wheel Cleaner, or Iron Out Contaminant Remover, depending on the level of contamination and the wheel finish. With the wheels removed, you’ll find it much easier to reach the barrels and behind the spokes. Regular deep-cleaning of these areas is ideal for maintaining your rims in excellent condition, as the inner sections often become just as, if not more, contaminated than the outer surfaces.
For detailed information on cleaning all types of wheels, including those with specialist finishes, see our comprehensive article: "The Definitive Guide to Cleaning Alloy Wheels."
For your tyres, use a generous amount of Tread Tyre Cleaner and give them a thorough scrub with our Rubber Scrubber Tyre Brush. This will help prevent browning and fading, and create an ideal surface for tyre dressing to bond effectively at the end of your detail.


Next up is the bodywork, and it's crucial to ensure that any vehicle is thoroughly cleaned and decontaminated before reaching for the machine polisher. Even though we'll be addressing paint blemishes later, it’s essential to follow all standard washing procedures—not just during routine maintenance, but with every detail. Most paint defects, including those pesky swirl marks, result from poor washing techniques. Skimping on the wash now will only create more issues, requiring additional effort to correct them later. To maintain your vehicle’s finish throughout the season, you definitely don’t want to introduce new defects after polishing.
This underscores the importance of the wet work in any detailing process. It’s essential to start with a thorough 2-stage pre-wash, using Citrus Power Bug & Grime Remover and Avalanche Snow Foam. Be sure to flush out panel gaps, door jambs, and fuel flaps to prevent contaminants from interfering with your polishing. Following this, perform a two-bucket contact wash with Lather Car Shampoo. This careful approach helps eliminate the risk of transferring harmful gritty particles with your wash mitt, reducing the chance of causing blemishes.


The final stage of the "wet work" is decontamination, where bonded and embedded contaminants are removed. This step is essential before any polishing or paint correction, no matter how detailed the rest of your cleaning process is. The aim is the same as with removing general grime: to prevent inflicting further damage during polishing. Decontamination requires specialist detailing products to tackle contaminants that washing alone cannot shift.
We employ a 3-stage process to ensure all types of contamination are effectively removed, starting with the most likely to cause scratches—sharp metal fragments from brake dust that embed in your paint or lacquer. These metal particles can only be safely removed using Iron Out Contaminant Remover, which chemically dissolves them. The product reacts with the iron deposits, breaking them down into a solution that can then be rinsed away. Iron Out is suitable for all types of paintwork and can be gently agitated with a Microfibre Applicator or Work Cloth for optimal results. Here, you’re not scrubbing the product in but simply moving the solution across the surface, ensuring that spent solution (containing dissolved metal) is displaced and replaced with fresh solution to tackle any remaining contamination. You'll notice Iron Out turns blood red once it has reacted, at which point it can be safely rinsed away along with the metal particles.
Next, use ObliTARate Tar and Glue Remover to safely dissolve sticky residues, making them easy to rinse or wipe off with a microfibre cloth. This potent solvent effectively tackles everything from stubborn tar and traffic cone marks to tough glue residues. The process is both quick and straightforward, with ObliTARate immediately breaking down these contaminants. Just remember to rewash the treated areas with your Lather Shampoo to neutralise the solvent and prevent it from interfering with the final stage.
Finally, use a Clay Bar with Glide Clay Lube to physically remove protein and mineral deposits, such as those from rainwater and bird droppings. This step should be carried out on all the paintwork to achieve a smooth, glass-like finish before polishing.
For a detailed explanation of the complete 3-stage decontamination process, refer to our guide, *How to Safely Decontaminate Paintwork*.


Once the wash and decontamination are complete and the vehicle is thoroughly dry—ensuring all drips from mirrors and recesses are gone—it's crucial to mask any rubbers, weather strips, door handles, and badges that might come into contact with your polishing pad. This step not only protects the pads from damage caused by contact with sharp edges at high speeds but also prevents compound from affecting sensitive surfaces. Compound stains on rubbers can be challenging to remove, but using Detailer's Masking Tape makes it quick and easy to eliminate the risk. This is a professional practice for a reason.

Clearly, this is the core of the process—the main reason we're all here. Regardless of the severity of the swirl marks, the application of One Step remains consistent for every vehicle:
1. Whether you’re using a full-size DPX Dual Action Polisher or our MPX DA with its 3-inch backing plate, One Step is intended for use with a medium foam pad. Our Revitalise No:2 Foam Pad (5-inch) or yellow Revitalise Spot Pad (3-inch) feature open cell foam that provides enough bite to effectively cut out swirl marks and break down the compound, yet remains soft enough to finish smoothly without needing to switch to a softer pad. If you’re using a new pad, we recommend applying a fine mist of Pad Prime before adding your compound. This helps lubricate the pad on the initial pass, reducing the risk of unwanted scrubbing.
2. Apply 2-3 pea-sized drops of product to your pad; this amount is sufficient for a working area of about 24 inches square. Set your machine to the lowest speed and quickly spread the product across the panel, aiming for even coverage. This ensures that the compound is distributed evenly, allowing it to cut effectively and work through properly. Always ensure the machine is in contact with the panel when you start and stop to prevent any slinging of the product.
3. Apply the One Step using slow, overlapping passes. Gradually increase the speed to a medium/fast setting (4-5 on a DPX) and use light downward pressure. Maintain a steady movement of about 2-3 cm per second. Continue working the product until the residue begins to turn clear. Remember, One Step transitions from a coarse to a fine abrasive, so it takes slightly longer than traditional compounds. On average, this process should take around 5 minutes.
4. Remove any excess residue from the pad by thoroughly cleaning it with a Pad Cleaning Brush or compressed air.
5. Reduce the speed setting to a moderate level (around 3 on a DPX) and make two additional passes over the panel. This step ensures that the product fully breaks down and refines the paint to near perfection.
6. Remove the compound residue from the panel with a fresh microfibre cloth.
7. For optimal results, especially when polishing indoors, we recommend using a light source like our Swirl Spotter Detailing Light to inspect the finish.
8. Once the section you’re polishing is free of swirl marks, proceed to the next section, continuing until the entire vehicle is done.


After polishing, it is essential to always apply protection. This serves two main purposes: first, it enhances the gloss and improves the appearance of your paintwork; second, it protects the finish and preserves your hard work by providing a barrier against the elements. This barrier increases water beading and makes your vehicle easier to clean during the next maintenance wash. Key considerations include how durable you need the protection to be and the desired appearance.
As mentioned, One Step contains no waxes or fillers, so the results of your machine polishing reveal the true finish of your paintwork. This also allows for the use of a ceramic coating, as there are no barriers to prevent the chemical bonding of the coating. For top-notch protection and durability, a silica-based (SiO₂) ceramic coating—like the one in our Caramics Paintwork Protection Kit—is an excellent choice. Caramics offers up to a year of protection and enhances gloss by smoothing the optical finish of the lacquer layer. It’s ideal for additional protection, whether for a daily driver or a high-performance track car. If you’re curious about the benefits of a ceramic coating, check out our guide: "What Difference Does A Ceramic Coating Actually Make?"
In our scenario, we’re working with a car that’s both a showstopper and a daily driver. Since we firmly believe that nothing matches the warmth of a wax finish, we’ll be applying wax protection after using One Step.
Similar to a coating, a hard wax—such as those found in our Signature Hard Wax Collection for various paint types—smooths the optical finish by filling in microscopic imperfections on the surface. This allows light to pass through and reflect back uniformly, enhancing the depth and gloss of the paint. Additionally, a wax can provide durability for up to 5-6 months, depending on the content of natural wax, like our Brazilian T1 Carnauba.
Unlike coatings, which are designed to be perfectly clear, waxes contain trace impurities that subtly absorb or bend light. These impurities are what give waxes their characteristic warmth. Ironically, it's these very imperfections that contribute to the wax's wet, glossy, and richly warm appearance.
Ultimately, your choice depends on the finish you desire and the level of protection you need, which often relates to how you use your vehicle. Our waxes, sealants, and coatings are all straightforward to apply, so select the one that best suits your requirements.
For this eye-catching Honda, we've chosen our Spirit Car Wax, which is specially formulated to restore the sparkle to metallic paintwork. Containing 50% Carnauba, this apple-scented wax provides up to 6 months of protection, delivering exceptional visual clarity and gloss. It's the perfect product to enhance the stunning custom blue finish.

It's also important to mention that right after our correction process, we used Rejuvenate Paintwork Cleanser to prepare the surface for applying our Spirit Wax.
In many cases—especially when polishing isn't involved—the fine abrasives and cleansers in Rejuvenate can be used directly after the wet stages to remove oxidation before applying a wax layer. However, in our situation, where polishing has been done, we're using Rejuvenate as an additional step to eliminate any residual compound that may still be deep in the paint. This ensures that nothing interferes with the wax's ability to bond effectively.
When applying wax, remember that "application on every painted surface" doesn’t mean you need to apply an excessive amount. It's a common mistake, even among experienced detailers. Applying too much wax often results in most of it being buffed off, which just wastes the product.
We suggest using our Waxmate XL or Wax Spot Pad, which are designed to fit perfectly inside the pots. A quarter turn in the tin should provide enough wax to cover an entire panel. Apply the wax as thinly and evenly as possible. After the recommended curing time, gently buff away any excess wax. Allow at least 3 hours for the wax to fully harden before applying a second coat. Two layers, bonded one on top of the other, will deliver the deepest gloss and enhanced protection.

That’s how you can use One Step All-in-One Compound to eliminate swirls and prepare your vehicle for your next event. With the right protection, you can lock in those results for an entire season, enhancing the depth and gloss of your paintwork. But remember, as detailing professionals, we’re not done yet—there’s always more to perfect!
Every detail must be completed thoroughly, which means addressing any minor imperfections that might detract from your overall work. Paint correction requires careful attention, but achieving a flawless finish can sometimes reveal other areas that need improvement. Fortunately, there are quick and easy steps you can take to resolve any issues that don't meet your standards.
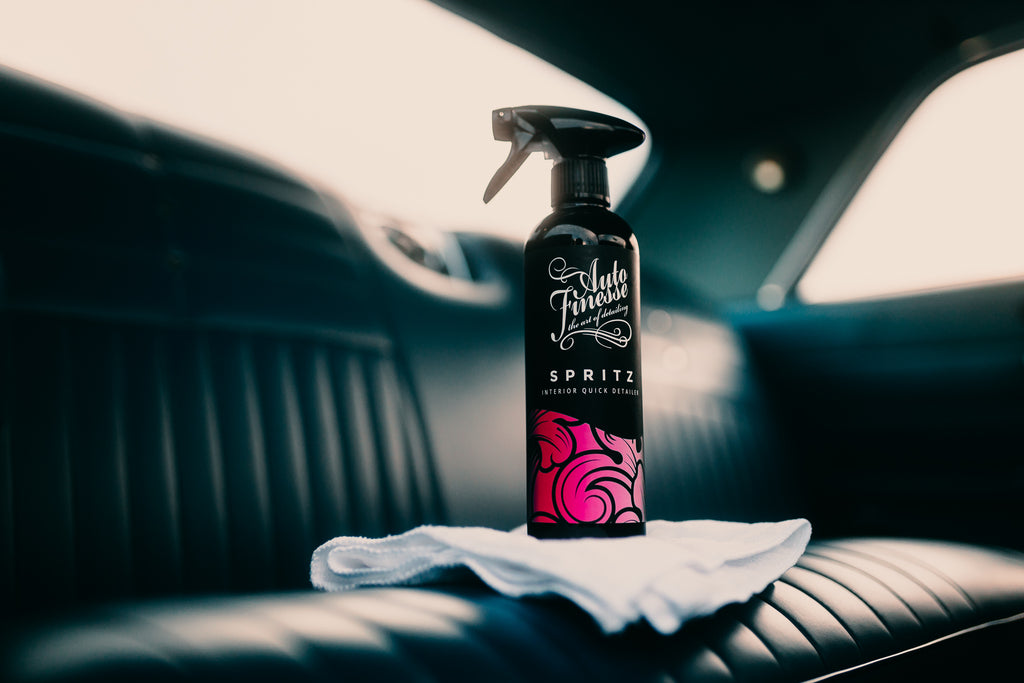
Here's where you can take your detailing to the next level. As shown in the video, we also gave the interior a thorough clean using Total Interior Cleaner and Spritz Interior Detailer. We polished the exhaust tip with Mercury Metal Polish and, as with every detail job, finished by dressing the tyres with Satin Tyre Crème and making the windows gleam inside and out with Crystal Glass Cleaner.
Other finishing products that might be useful include Revive Trim Dressing for matte plastics and Dressle All Purpose Dressing, which is highly versatile for both interior and exterior use. We find Dressle especially effective on engine bays and plastic wheel arch liners. How extensive your detailing goes will depend on the vehicle and the time available—but we’ve already saved you a lot of time on the correction process, haven’t we?


One final essential for your detailing kit is a product you shouldn’t be without—always finish with Finale! Our flagship carnauba-infused quick detailer is perfect for a final wipe to safely remove any dust or stray fingerprints, and the results are impressive. This is exactly what you can achieve without spending several days on a full multi-stage correction.


For detailed information on single and multi-stage paint corrections, machine polishing, and removing heavy swirl marks, check out our comprehensive guides: "How to Remove Swirl Marks from Paint" and "The Basic Guide to Machine Polishing".


